quarta-feira, 29 de outubro de 2014

Julep Inspired Halloween Tutorial - Black Cat in the Moonlight

Hello loves! :)

A couple of weeks ago I was contacted by Julep to see if I was interested in doing a Halloween nail art or to follow a tutorial they created. I was interested in the last, of course! Why? Because I found the tutorial to be super cute and I don't have time to be creative at the moment (I'm moving) :) Julep is a known USA brand that unfortunately doesn't sell in Europe. They have a huge selection of nail polish colors, and one of my favorites (wish list!) is Julep Bailey.

Há umas semanas fui contactada pela Julep para criar uma manicure de Halloween ou simplesmente seguir o tutorial que eles fizeram. Escolhi o último porque achei o resultado super adorável e também porque estou sem tempo para criar algo original! :) A Julep é uma conhecedíssima marca de vernizes Americana que infelizmente não vende na Europa. Têm uma variadíssima gama de vernizes e aquele que eu desejo mais é o Julep Bailey.

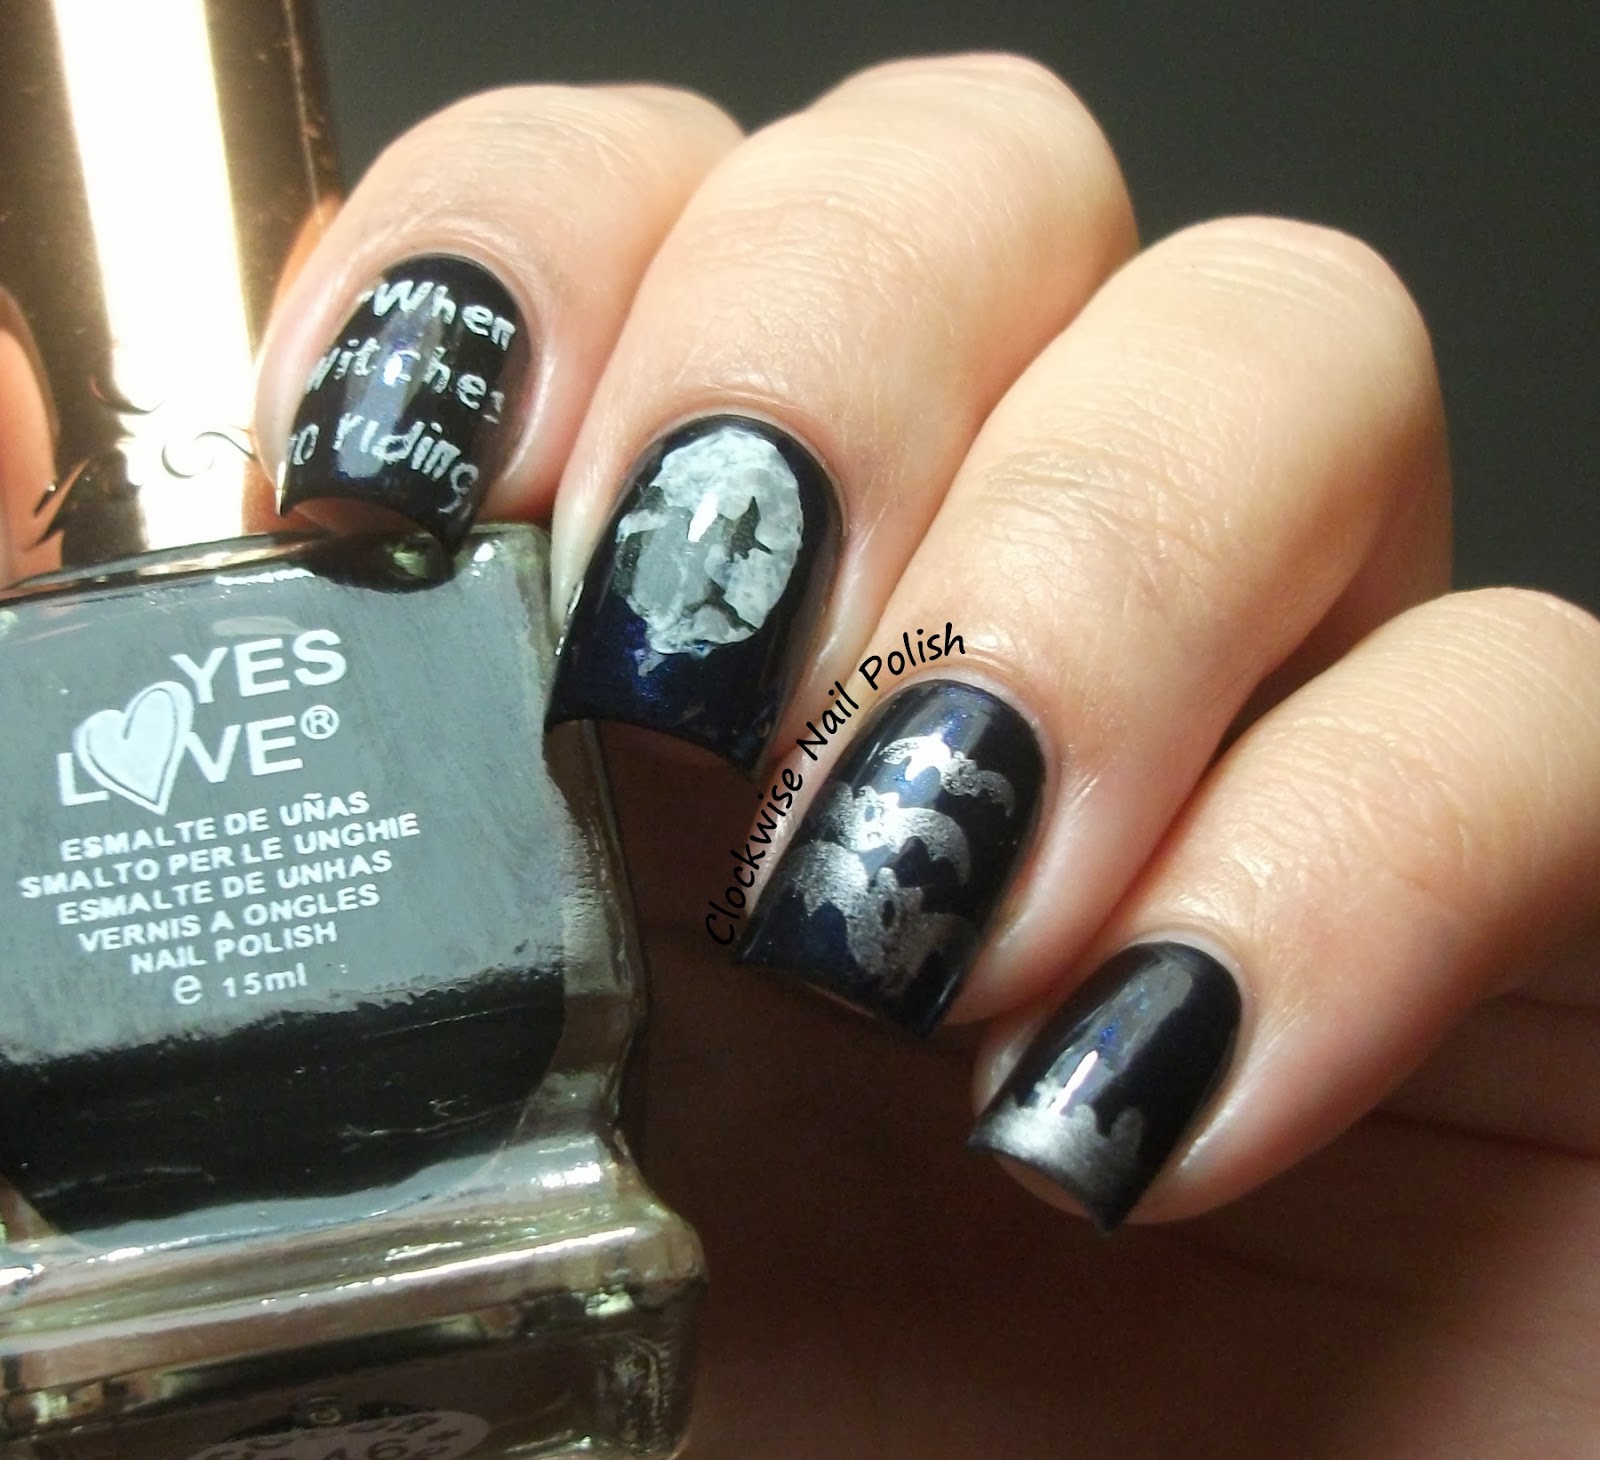
The full design is a black cat, jumping in a fence against the back moonlight. Lovely! I followed each step proposed by the brand in the tutorial picture above. For the blue base, since I don't own Julep Lacey, I painted two coats of Trosani 90. For the fence, moon and cat I used acrylic paint. I thought my cat would look terrible, but I'm very pleased with the outcome, yay! :D I love the Julep tutorial, but there was something missing in the night... stars! So, I just placed a little glitter from Kiko 230 Rainbow Glitter et voilá! :)

O tutorial é para um gato preto a saltar numa cerca, com a lua cheia como pano de fundo. Adorável! Segui cada um dos passos propostos pela marca no tutorial da foto acima. Como não tenho o verniz Julep Lacey, usei como azul de fundo o verniz Trosani 90. Para pintar a vedação, lua e gato preto, usei tintas acrílicas mas vocês podem também usar qualquer verniz de cor parecida :) Estava com tanto medo de desenhar o gato...!! Mas não ficou tão mal quanto esperava! :D Adorei o tutorial da Julep, ma achei que estava faltando algo na noite... estrelas! Dei então o meu cunho pessoal colocando glitter ao de leve no "céu" com o verniz Kiko 230 Rainbow Glitter :)
This was a fun Halloween tutorial to recreate, plus the Man of the house didn't laugh at my cat! Win! hahah What do you think? Kisses,

Foi sem dúvida um tutorial bastante divertido de recriar, além de que o Homem da casa não gozou do meu gato! Hahaha :D O que acham? Usariam? Beijinhos,

Cristina Santos***

terça-feira, 28 de outubro de 2014

Revel Nail Festival Review & Leopard Print Mix & Match

Hola guapas! :)

A couple of week ago I had this desire to do a red nail art... and Revel Nail Festival fulfilled it :) Most of us nail polish lovers love red, but don't use it quite often because we don't want to look like everybody else on the street... we want to scream our love of nail polish to the world! I belong to this part hahaha, so using red is quite pleasurable :)

Há umas semanas "saciei" o desejo de usar verniz vermelho com o verniz gel Revel Nail Festival. A maior parte das pessoas "viciadas" em verniz são apaixonadas por vermelho, mas não o usa frequentemente para não parecer "mais uma" na rua... a verdade é que gosta de mostrar o quanto ama vernizes com as cores mais diversas do arco íris. Eu pelo menos encontro-me neste sector :p, de modo que usar vermelho é deveras agradável :)
Festival is a gorgeous red! Suuuuper shiny and vibrant, yet with a strong elegant touch <3 It belongs to the Revel Nail Spring collection but is a timeless shade for sure! I applied it as recomended by the brand in three thin coats. I experienced no shrinking or pooling near cuticles. Formula has a very nice consistency and flows very wel throughout the nail - a great red creme. I like it a lot! :) I decided to do a leopard print... just because! haha. The golden shimmer (drop dead gorgeous!) and black are Revel Nail Solid and Rebel, respectively. Solid is... out of this world! Strange enough, I also love the slight frosty finish it has :) The leopard print is toped with a coat of Revel Nail Top Coat.

O verniz gel Festival é realmente lindo!! É suuuper brilhante e vibrante, mas mantém ao mesmo tempo um certo ar de elegância. Adoro! <3 Pertence à colecção de Primavera da marca, mas para mim é sem dúvida uma cor intemporal. Apliquei o verniz gel Festival tal como recomendado pela marca e em três camadas fininhas. A formula é muito boa em termos de aplicação, pois não escorre para as cutículas e é fácil de manusear na unha; por outro lado, não encolhe. É um excelente verniz gel cremoso. Para o complementar fiz um padrão de leopardo... porque me apeteceu :p Combinei o Festival com verniz gel dourado (divo!!) e preto - Revel Nail Solid e Rebel, respectivamente. O Solid é qualquer coisa de magnífico porque tem shimmer dourado e acabamento ligeiramente frosty que normalmente não gosto, mas que resultou muito bem! Selei o padrão com uma camada do top coat Revel Nail.
Ohhh I love this sexy look so much!! :D Leopard prints go well with pretty much everything... but it really stops traffic when matched with red! hahah Do you own any creme Revel Nail? Would you rock this manicure? Kisses :)

Oh pah, adorooo este look sexy!! :D É verdade que o padrão leopardo combina com quase tudo à face do planeta, mas ganha um poder indiscutível quando combinado com vermelho, não é? Têm algum verniz gel cremoso Revel Nail? Usariam esta manicure? Beijinhos :)

Revel Nail Websitehttp://www.revelnail.com/
Revel Nail Facebookhttps://www.facebook.com/RevelNail
Revel Nail Instagramhttp://i.instagram.com/revelnail/
Revel Nail Twitterhttps://twitter.com/revelnail

Cristina Santos***
*Products provided by Revel Nail for my honest and unbiased review 
*Produtos enviados pela Revel Nail para revisão honesta e imparcial 

segunda-feira, 27 de outubro de 2014

Halloween Nail Art 2012 & 2013 Recap

Hello loves! :)

Before I publish my rather few 2014 Halloween manicures, I want to do this quick recap of last years nail arts. To be honest, I'm not quite feeling the vibe this year... maybe because I have lots to do until the end of the month. But looking at these pictures and the huge amount at IG, I almost change my mind! hahahah Thing is, all my polishes are now in boxes :p 

Antes de publicar as poucas nail arts de Halloween que fiz este ano, lembrei-me de fazer uma recapitulação das nail arts dos anos anteriores :) A verdade é que este ano não estou a sentir aquela vibe... talvez porque tenho imenso para fazer até ao fim do mês. Mas ao ver estas fotos e as que invadem o IG a toda a hora, fico assim com vontade de fazer algo diferente... no entanto, todos os vernizes já estão encaixotados hehehe.
Please, bare in mind that these pictures show my progress in the last years... though I know I still have lots to improve in taking pictures. Click the picture to be directed to the original post with all the correspondent info.

As fotos seguintes demonstram a minha evolução ao longo do tempo, de modo que nem todas estão perfeitas (se bem que sei que tenho muito a melhorar com as fotos e espero fazê-lo em breve). Cliquem nas fotos para serem redireccionados para os posts originais com toda a informação correspondente.
P.S: I had to add Zombie Nails! 
Do you have any favorites?? :) I hope this post inspires you for the upcoming Halloween in case you don't know what to do yet! Kisses***

Têm alguma nail art predilecta?? :) Espero que este vos inspire, caso ainda não tenham decidido o que fazer para o próximo Halloween! Beijinhos***

Cristina Santos***

sábado, 25 de outubro de 2014

Étude House PHW 902 & Fall Nail Art

Hello gorgeous! :)

Quick post today as I'm going out in a bit :) Today's manicure was born after Camila challenged me to wear a wine nail polish. I was like "ok, sure!" but then I looked at my stash... oh gosh, how the hell do I own a single creme wine polish?? I do like the color very much! Now you know what to get me for Christmas! ;) hahaha

Para hoje temos um post rápido porque vou sair daqui a nada e estou a escrever à pressa heheheh :p Na semana passada a Camila desafiou-me a usar verniz vinho... e eu pensei "ok, é para já!". Mas assim que abri as gavetas do Alex... ou não! como é que só tenho um verniz vinho cremoso nesta colecção inteira?? Pois! Agora já sabem o que me oferecer no Natal! hahahaha
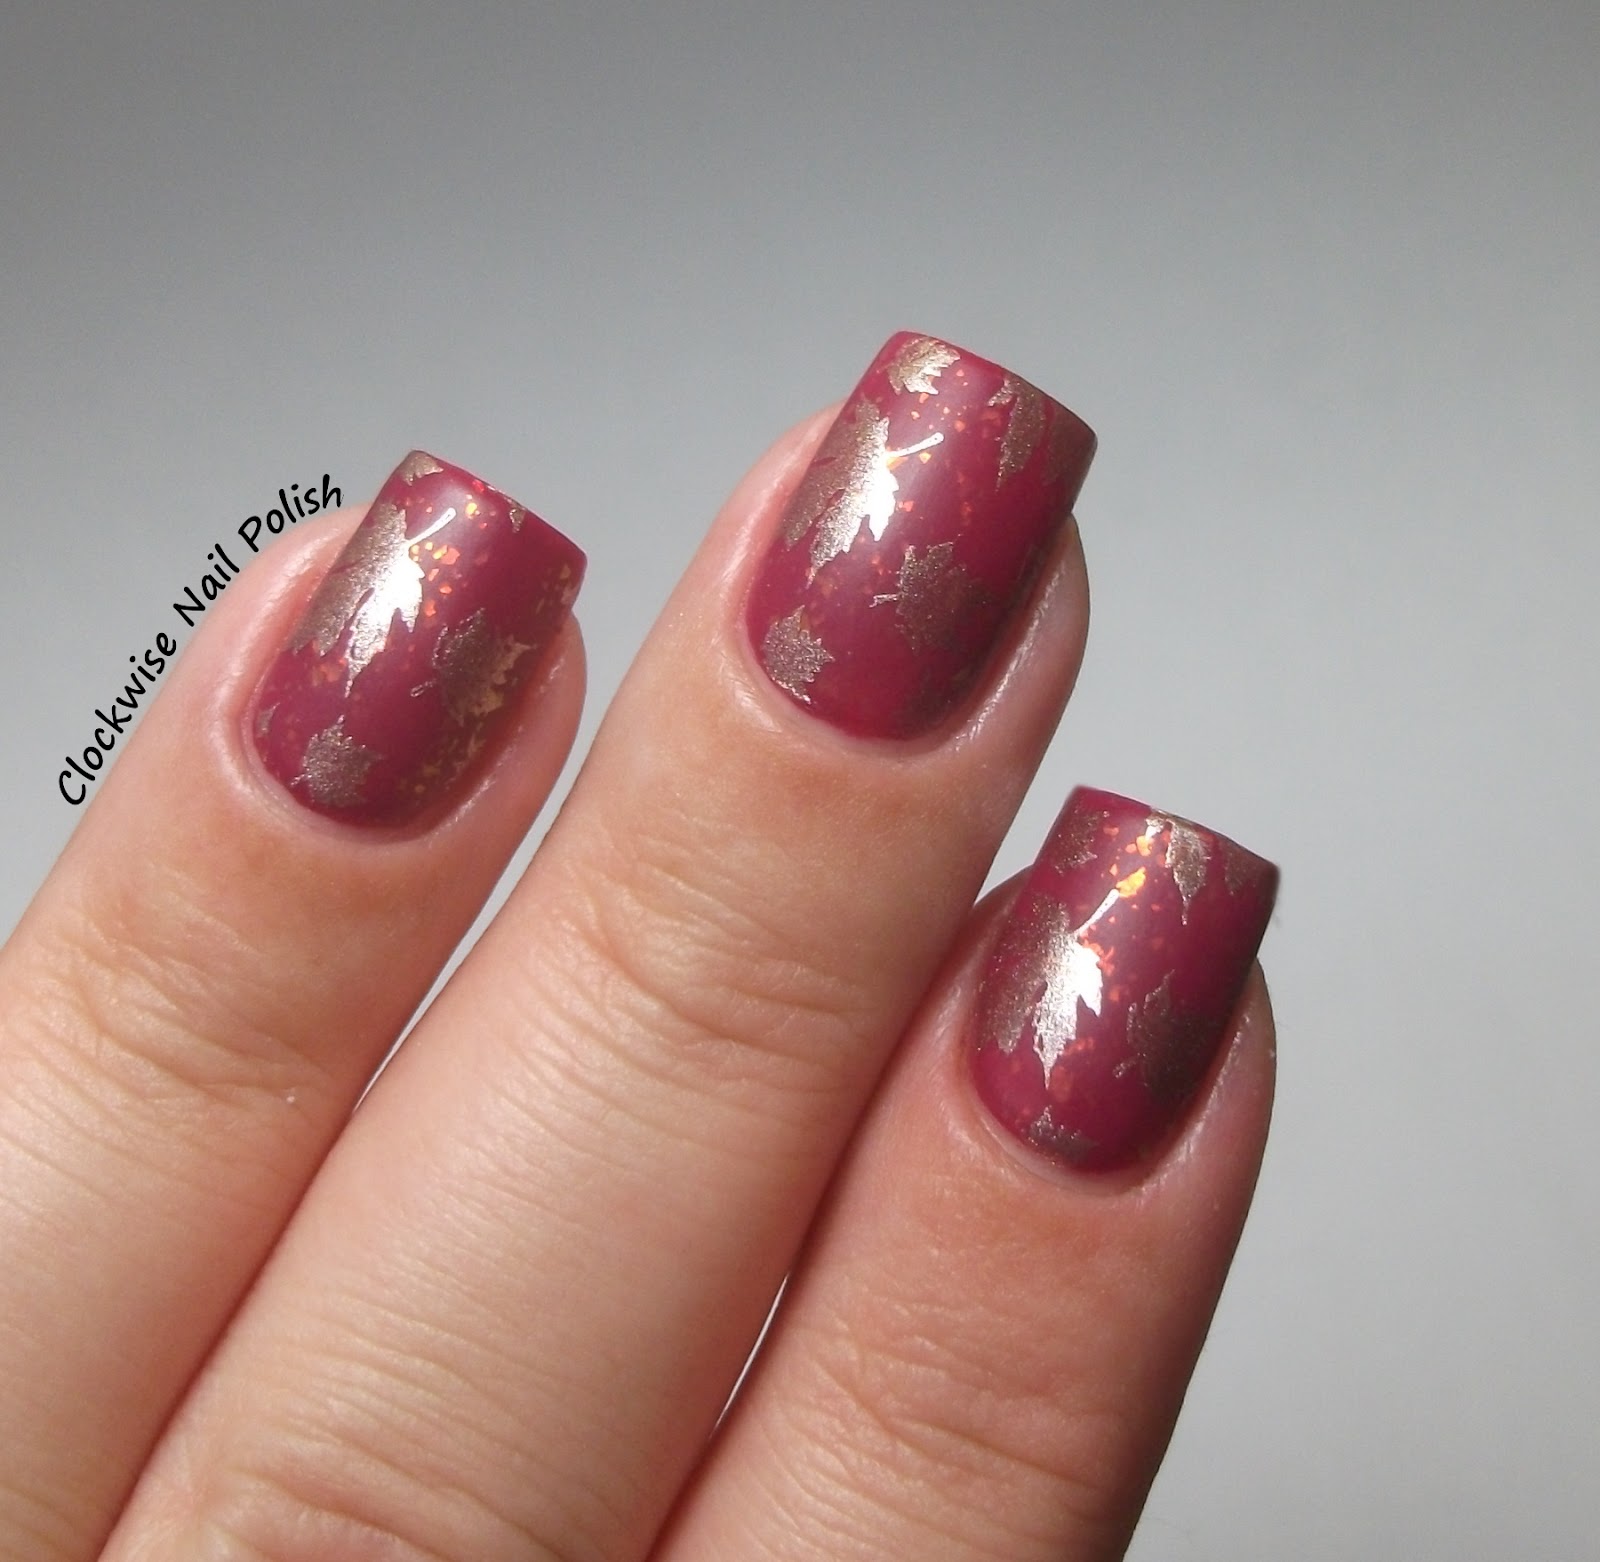
My lonely creme wine polish is Purple Professional 8 Cherrie Pie. After applying two coats (formula is still great after two years!) I had to take this chance to wear Étude House PHW 902 who has been patiently waiting for it's time to shine :p This Étude House has multi colored flakies (mainly orange & green) in a transparent base, but it isn't packed as much as I hoped hence I applied two coats. The flakies & wine combination was inspired by Eva :) As for the nail art, I quickly stamped the leafs pattern from lesly LS-22 plate with Orly Voyeuristic Adventure and finally finished with a coat of Mollon Pro Top Coat Matt.

O verniz vinho solitário é o Purple Professional 8 Cherrie Pie. Apliquei duas camadas (a formula continua excelente depois de dois anos aberto!). Aproveitei então para usar o verniz Étude House PHW 902 (frasquinho fofo!) que há muito aguardava pacientemente as luzes da ribalta. Este verniz é constituído por flocos de várias cores (maioritariamente laranja e verde) numa base transparente: contudo não é um acabamento flocado carregado como eu gostaria pelo que apliquei duas camadas. Na verdade, a combinação de vinho com flocos veio desta bela manicure que a Eva fez, caso contrário a base seria preto ou azul escuro segundo os meus testes :) Relativamente à nail art Outonal, carimbei o padrão de folhas da placa Lesly LS-22 com o verniz Orly Voyeuristic Adventure e terminei matificando tudo com o verniz Mollon Pro Top Coat Matt.
I really loved the outcome! *-* Now, I only used this manicure for two days, but it never chipped in that time. What are your favorite wine polishes?? I must get a couple more, how amazing it is that I only own one?? Kisses and have a great kick start of the weekend! 

Amei o resultado! <3 Usei esta manicure por dois dias, findos os quais não verifiquei quaisquer lascas. Digam-me, quais são os vossos vernizes vinho favoritos?? É incrível que na minha colecção só haja um! O.o Despeço-me com votos de um excelente fim de semana! Beijinhos,

Cristina Santos***

sexta-feira, 24 de outubro de 2014

Sensationail Pink Chiffon Gel Polish Review & Breast Cancer Awareness Nail Art

Hello sweethearts! :)

Earlier this week I posted the first part review of the Sensationail Starter Kit. The Starter Kit gel polish color that I chose was Sensationail Pink Chiffon. Like I mentioned, I want to redeem myself of not yet doing a breast cancer awareness manicure. Therefore, the one you will see today will last for two weeks! :)

No início desta semana publiquei a primeira parte da minha review do Kit de Iniciação de verniz gel Sensationail. A cor do kit que escolhi é o Pink Chiffon e como mencionei anteriormente, fiz com ele uma nail art de consciencialização do cancro da mama como forma de me redimir pelo facto de ainda não ter feito nada (estou a usar esta nail art por duas semanas!) :)
Lets talk about Sensationail Pink Chiffon gel polish, which I applied just like proposed by the brand. At first, I found the brush to be very small but soon changed my opinion. Its round and soft, allowing a controlled application near the cuticles (particularly in pinky). I like it, although I prefer flat brushes. Formula wise, Pink Chiffon is a sheer milky pink; I experienced no pooling or shrinkage. In the index & middle fingers I applied four thin coats of Pink Chiffon; in the ring finger & pinky three coats. Clearly four coats is the best for full nail coverage since you can see some bald spots on pinky & ring finger. However, this didn't trouble me because I knew I was going to do some nail art afterwards. I finished with a coat of Sensationail Base & Top Coat and noticed the beautiful shine it provided! So far it is lasting, but that's a subject for another post! ;) I'm moving to a knew place at the end of this month (yey!) and because of that, I applied a coat of acrygel underneath Pink Chiffon; this is the reason why the gel polish looks thick! In my right hand I didn't apply acrygel therefore I can see it isn't thick at all! :)

Vamos conversar sobre o Sensationail Pink Chiffon :) Apliquei-o seguindo os passos recomendados pela marca, indicados no primeiro post. O pincel é pequeno e redondo e por isso pensei que não ia gostar... mas rapidamente mudei de ideias porque permite controlar bem a aplicação do verniz gel junto das cutículas. Tenho preferência por pincéis achatados, mas gostei deste. A nível de formula, esta é pouco pigmentada e tem aquele acabamento rosa cremoso leitoso. Não verifiquei encolhimento nem escorrimento para as cutículas do verniz gel Pink Chiffon, mas a verdade é que tudo isto é evitável se aplicarem camadas fininhas. Apliquei três camadas nos dedos mindinho e anelar, e quatro camadas nos dedos indicador e meio. É claramente notório que quatro camadas é o ideal para cobrir uniformemente a unha pois pode-se verificar pontos "carecas" nas duas unhas com três camadas. Mas isto não me incomodou porque sabia que ia posteriormente fazer uma nail art. Pelas fotos parece que o Sensationail Pink Chiffon fica espesso nas unhas, mas não se deixem enganar! A verdade é que como vou mudar de casa até ao fim do mês, não quis correr riscos e apliquei uma camada de acrygel nesta mão para proteger as unhas; já a mão direita tem só o verniz Pink Chiffon :p
About the breast cancer awareness manicure, I just knew I wanted to incorporate a bow in it somehow! I have these huge recently bought bows... but I was too scared I'd loose one whilst moving card boxes around hehe :p So, rhinestones bow it is! I picked two different sized silver rhinestones plus small silver beads and placed them carefully over a teeny drop of gel top coat. I love the outcome! Then, of course I had to use the breast cancer design from Bundle Monster BM321 plate! :) Stamped in white with Dashica White polish. Finally, I draw some silver hearts and then used acrylic foil on top of it. This was my first foil experience and I can't wait to play more with it! :D (used Catherine foil and foil glue). I finished everything with a coat of Sensationail Gel Base & Top Coat.

Sabia que ia de alguma forma incorporar um laço na manicure de consciencialização do cancro da mama. Comprei recentemente uns laços enormes super giros... mas fiquei com medo de perder algum enquanto movesse caixas de um lado e outro, por isso decidi criá-lo com rhinestones! :p Seleccionei dois tamanhos de strass prata e esferas de nail art prata (qual o nome disto em português gente?). Coloquei cada peça uma a uma, sobre uma gota pequena de top coat gel e depois curei na lâmpada LED para selar as peças no seu lugar. No dedo do meio carimbei o símbolo do cancro da mama da placa Bundle Monster BM321, que não podia deixar de usar! Já no dedo indicador, realizei a experiência de brincar com foil pela primeira vez. Desenhei vários corações prata e depois apliquei o foil prata da Catherine, utilizando a cola para foil também da Catherine. Adorei, mal posso esperar para brincar mais com isto! :p Finalmente terminei tudo com uma camada do Sensationail Base & Top Coat :)
I love the simplicity of the design and how it calls for attention! It is important to remind people and women around us to do their regular breast check up and to remember our loved ones who suffer from this disease! Have you done a breast cancer awareness manicure already? Share it with me in IG! :) Kisses,

Adoro a simplicidade da manicure, mas também de como chama por atenção! É importante lembrar às mulheres em nosso redor que têm de fazer o seu teste anual ao peito, bem como lembrar os nossos entes queridos e familiares que lutam arduamente contra o cancro da mama! Fizeram alguma manicure a suportar esta causa? Se sim, mostrem-ma pelo IG! :) Recordo que o Kit de Iniciação Sensationail encontra-se à venda em todas as lojas Perfumes & Companhia por 68.90€, mas também encontram o verniz gel Pink Chiffon com 7ml por 18€ (ou 9€ em promoções ocasionais). Beijinhos,


Cristina Santos***
*Products provided by Sensationail Portugal for my honest and unbiased review 
*Produtos enviados pela Sensationail Portugal para revisão honesta e imparcial 

quinta-feira, 23 de outubro de 2014

Mollon Pro 197 Platinum Review & Ghost Nail Art

Follow my blog with Bloglovin
Hello loves! :)

I have more shades of the "Fall Trends" Fall collection from Mollon Pro to share with you :) Today I'll be focusing in Mollon Pro 197 Platinum, but you can also check 195 Blue Beryl, 199 Beige Amber and 200 Anyx. As we are very near to Halloween, I guess its about time I also show something related to it, right? Although Halloween isn't very much celebrated around here, its fun to create different nail ars :p

Tenho mais vernizes da colecção Outonal "Fall Trends" da Mollon Pro para vos mostrar! O de hoje é o Mollon Pro 197 Platinum mas podem também ver o 195 Blue Beryl, 199 Beige Amber e 200 Anyx. Optei por conjugar  o verniz Platinum com uma nail art de Halloween. Porquê? Ora, porque estamos cada vez mais perto desta data e eu ainda não actualizei aqui o blog hehe. Sei que não celebramos muito o Halloween em Portugal (excepção às festas nocturnas e brincadeiras nas escolas!), mas é uma oportunidade de brincar e desenvolver nail arts difrentes :)

As opposed to its name, Mollon Pro Platinum is a rich creme grey polish. I said gray... but this is something special! I was unsure in real life, but pictures truly brings out the blue undertones in Platinum, though being very discreet. This is possibly the best formula wise polish of the collection. Its super pigmented and I experienced no bald spots whatsoever. I applied two coats, but if you have small nails you can probably get away with only one. Platinum also has a very smooth and easy to apply formula as well as lovely glossy shine.

Por oposição ao seu nome, o verniz Mollon Pro Platinum (platina) tem um tom cinza com acabamento rico e cremoso. Mas não é um cinza qualquer! Tem um fundo azul que se destaca nas fotos, apesar de timidamente na vida real. Em termos de formula, o Mollon Pro Platinum é se calhar o melhor da colecção neste quesito. É bastante pigmentado e a formula é suave e fácil de aplicar, sendo que não experimentei pontos carecas na aplicação. Apliquei duas camadas, mas se têm unhas pequenas, possivelmente safam-se com uma :p. O tempo de secagem é bastante positivo, tal como o brilho glossy.
I have several polishes from last year Halloween collections that I never got tu use (yet!). Realce Gato Preto is one of them; it has black and silver hexs, as well as black bars in a transparent base. I think it compliments Mollon Pro Platinum very well :) This is two coats and I had to fish a bit for the bigger black hexs. To finish it off, I only had the courage to draw an angry, scary ghost with acrylic paint! I thought about doing more ghosts... but I really loved the simplicity of this.

Tenho alguns vernizes não usados (ainda!) de colecções de Halloween do ano passado... vida de blogger... (é a minha desculpa cof cof) hehehe. Um deles é o Gato Preto da Realce, constituído por glitter hexagonal prata e preto, bem como barras pretas numa base transparente. (barras? ugh esqueci-me do nome correcto!). Achei que o glitter ia combinar muito bem com o verniz Mollon Pro Platinum e assim foi. Apliquei duas camadas e tive de pescar os glitter hexagonais maiores. Para terminar, desenhei um fantasma zangado com tinta acrílica. Pensei desenhar mais fantasmas... mas a verdade é que adorei esta simplicidade :)
I call this ghost Chico heheh. So, you better behave or I will send Chico after you when you're sleeping! Muahahaha! On another very important note, did you know that Mollon Pro launched a webstore in Portugal last week?! Yeahh! :D It is now very easy for you to check if your country has a brand distributor, see the website here! If not, you can always get in touch with Mollon Portugal :) Kisses,

Porque este fantasma é já uma personagem da minha vida, chamo-o de Chico! xD Por isso... vejam lá se se portam bem, ou mando o Chico perseguir-vos noite dentro! Muahahaha!! Agora uma coisa importante! Já sabem que a Mollon abriu uma loja online em Portugal?? Yeah!! Todos os vernizes e demais produtos da marca estão disponíveis no website :) Não deixem de o ver (é uma tentação!). Beijinhos,

Mollon Pro Websitehttp://www.mollonpro.com.pt/

Cristina Santos***
*Products provided by Mollon Pro Portugal  for my honest and unbiased review 
*Produtos enviados pela Mollon Pro Portugal para revisão honesta e imparcial 

quarta-feira, 22 de outubro de 2014

A England Rose Bower & Essence Dare It Nude

Hola guapas! :)

A England Rose Bower has been such an elusive nail polish so far! But hey, I finally have the pleasure to say... MINE! hahahah (#nailpolishissues). I bought it a couple of weeks ago in a group buy at Hypnotic Polish Store. A week or two before, I also went in a polish hunt to find Essence Dare It Nude after I saw Ewlyn wear it... it was easier than I anticipated hehe :p

Se há verniz que me esquiva a toda a hora, é o A England Rose Bower! Há séculos que o desejo... e posso finalmente dizer: és MEU! (não se preocupem, a minha sanidade mental permanece intacta :p) Comprei-o há umas semanas na loja Hypnotic Polish. Na semana anterior, andei à caça do verniz Essence Dare It Nude nas lojas Wells mais próximas (afinal, não foi tão difícil encontrar como esperado), depois de o ver nas unhas da Ewlyn. Decidi combiná-los para não só satisfazer o meu prazer pessoal, mas também porque têm um certo ar Outonal gostoso ;)
Rose Bower is.. incredible! It has a deep red shade with the disperse holography characteristic of the brand... gorgeous! Pigmentation, drying time, application and shine are perfect! If you don't own an A England polish, you don't know what you're missing! ;) Essence Dare It Nude is also a very nude polish with a fine silver shimmer running through it. I love the color and pigmentation (two coats). In my hands, they both lasted three days without chipping.

Ahhh (suspiro) o verniz A England Rose Bower é simplesmente... incrível! Se nunca experimentaram um verniz desta marca do Reino Unido, não sabem o que estão a perder! Tudo é perfeito! O que distingue o Rose Bower é a sua cor vermelha, rica e profunda; depois tem aquela holografia dispersa. característica da marca, que lhe dá um toque de nobreza... adoro! *-* Mas também tenho elogios a fazer ao verniz da Essence: pigmentado (duas camadas) e muito fácil de aplicar. o Dare It Nude tem, como o nome indica, um tom nude percorrido por um shimmer prata fininho que lhe dá profundidade e leveza. Ambos os vernizes duraram três dias sem nenhuma lasca.
Almost all A England polishes stamp amazingly good, therefore I had to use Rose Bower for this purpose :p The lovely flower pattern belongs to Lesly LS-105 plate, which I also bought from Hypnotic Polish. Hope you these nails as much as me :) Kisses,

Quase todos os vernizes da A England carimbam muito bem, de modo que não podia deixar de usar o Rose Bower para esse fim. Portanto, carimbei o padrão florido da placa Russa Lesly LS-105 sobre o Essence. Adorei! E espero que vocês também :) A placa Lesly foi comprada na loja Hypnotic Polish, a única que vende a marca fora da Rússia. Beijinhos,

Cristina Santos***

terça-feira, 21 de outubro de 2014

SensatioNail Starter Kit Review - Part I: Brand Introduction & Application

Hola chicas guapas! :)

Now, lets start this week in big around here with a new (to me) gel polish brand review! :D I'm pretty sure you are familiar with Sensationail if you are either a nail technician or a gel polish lover, who hasn't right?? Sensationail is represented in several countries worldwide and recently in Portugal as well :) Be sure sure to check Sensationail website to learn about the distributors available in your country.

Vamos começar esta semana em grande com review de uma (nova para mim) marca de verniz gel! :D Aposto que a Sensationail é sobejamente conhecida, tanto por técnicas de unhas como por amantes de verniz gel, certo? ;) A marca está representada internacionalmente em inúmeros países, sendo que recentemente em Portugal também :) Vejam aqui o site para ver quais os distribuidores no vosso País.
Sensationail is an at-home gel manicure system, create by Fing'rs, a leader in the artificial nail Industry. Their professional gel system and LED technology provides women with salon-quality results. It's very easy to use at home and affordable as well.

Sensationail é um sistema de manicure verniz gel em casa. A marca foi criada pela Fingr's - líder na Indústria de unhas artificiais. O sistema gel profissional e tecnologia LED permite que as mulheres usufruam de resultados com qualidade de salão, no conforto do seu lar. É muito fácil de usar e acessível também!
Sensationail Starter Kit / Kit de Iniciação
So, what is the Sensationail Starter Kit content? It comes with everything we need to start doing our own nails at home. It provides a shiny and strong manicure that will last up to two weeks. The kit contents are estimated to provide you with 10 perfect applications. Lets see inside!

  • Sensationail LED Pro 3060 Lamp, which will cure your gel color to a damage-free and glossy shine. When on, the blue light will last for 60s but it also gives a beep at 30s;
  • Sensationail Gel Polish Color (3.69 ml) (Pink Chiffon, Raspberry Wine and Scarlet Red are available)
  • Double-sided small nail file, manicure stick and 12 lint-free wipes;
  • Sensationail Gel Cleanser (14.6 ml) to both clean your natural nail during prep and remove the tacky gel polish layer. It has a very easy & practical opening; 
  • Sensationail Gel Primer (3.54 ml) which will improve the adhesion of the gel polish to your natural nail;
  • Sensational Gel Base & Top Coat (3.69 ml), which will both protect your gel color a well as give it a long lasting shine and damage-free, strong finish;
  • Instructions leaflet.
I must admit I find the small bottles to be super cute and adorable, but my storage complex kills me when I try to store them near huge bottles hahaha. My home isn't perfect at cleaned up at all times, but trust me my polishes are! :p

Qual o conteúdo do Kit de Iniciação Sensationail? Este trás tudo o que é necessário para fazer 10 manicures em casa, com um resultado brilhante e resistente por duas semanas! Vamos ver:
  • Lâmpada Sensationail LED Pro 3060 que possibilita curar o verniz gel com um acabamento resistente e brilho glossy. Quando ligada, a lâmpada emite luz azul azul por 60s, mas também emite um sinal sonoro aos 30s;
  • Verniz Gel Sensational (3.69 ml) (estão disponíveis três tons nos kits de iniciação: Pink Chiffon, Raspberry Wine e Scarlet Red);
  • Lima pequena com dois lados, pau de laranjeira e 12 toalhitas;
  • Sensationail Gel Cleanser (14.6 ml) que permite tanto limpar as unhas naturais de resíduos, bem como remover a camada húmida do gel. Tem uma abertura bastante prática;
  • Sensationail Gel Primer (3.54 ml), cujo objectivo é melhorar a adesão do verniz gel à unha natural;
  • Sensationail Gel Base & Top Coat, produto que permite tanto proteger o verniz gel como dar-lhe maior durabilidade, resistência e brilho;
  • Folheto de instruções.
Tenho de admitir que acho os frasquinhos pequeninos super adoráveis e fofos, mas o meu TOC de arrumação não coopera hehehe (frascos pequenos não combinam com frascos grandes!) :p A minha casa não está sempre organizada (quero uma empregada!), mas lá os vernizes estão!
Application / Aplicação
Like I mentioned before, you have everything available in the kit. Fear not, your four nail of each hand fit perfectly and then you cure the thumbs. Let's check the application procedure of Sensationail Gel Polish (bare in mind that this is the same application to any Sensationail gel color you purchase):
  1. Prep your nails: remove any polish, wash, file and gently buff the natural bed;
  2. Use a Lint-Free wipe and clean nails with the Sensational Gel Cleanser;
  3. Apply one layer of Sensationail Gel Primer to nail and let dry (be carefull not to touch cuticles);
  4. Apply a thin layer of the Sensationail Gel Base & Top coat, be sure to cap the nail free edge and avoid skin and cuticles. Cure in Led Lamp for 30s;
  5. Apply a thin layer of the Sensationail Gel Color (Pink Chiffon in my case), cap the nail tip, avoid skin and cuticle and cure for 60s;
  6. Repeat step 5 until the gel color is uniform;
  7. Apply a thin layer of Sensationail Gel Base & Top Coat; cap the free edge, avoid cuticles and skin and cure for 30s;
  8. Finally, remove the moisture layer with a Lint-Free Wipe soaked in the Sensationail Gel Cleanser. You're good to go!
Como referi acima, tudo o que precisamos para uma correcta aplicação vem incluída no kit. Mas vamos então ver quais os passos recomendados pela marca (são os mesmos para qualquer verniz gel Sensationail):
  1. Começar por preparar as unhas: remover quaisquer resíduos de verniz, lavar as mãos, limar as unhas e gentilmente limar a superfície da unha com o buffer;
  2. Limpar a unha natural com uma toalhita embebida em Sensationail Gel Cleanser;
  3. Aplicar uma camada do Sensationail Primer e deixar secar ao ar (não tocar na pele);
  4. Aplicar uma camada fininha do Sensationail Base & Top Coat, não tocar nas cutículas com o produto, selar a extremidade da unha e curar na lâmpada LED durante 30s; 
  5. Aplicar uma camada fina do verniz gel Sensationail sem tocar nas cutículas, selar a extremidade da unha e curar na lâmpada LED por 60s;
  6. Repetir o passo 5 até que a cor do verniz gel esteja uniforme;
  7. Aplicar uma camada fina do Sensationail Base & Top Coat, não tocar nas cutículas, selar a extremidade das unhas e curar na lâmpada LED por 30s;
  8. Por fim, remover a camada de humidade com uma toalhita embebida no Gel Cleanser et voilá!
I followed each step mentioned and already started a wear test with Sensationail Pink Chiffon for the next two weeks. When I hit the 7 day mark, I will post and update of how my nails will look then. Now, as you know, October is the month dedicated to Breast Cancer Awareness and the color which represents it is pink. Since I haven't done anything yet, I thought I'd redeem myself with Sensationail Pink Chiffon. Therefore, this week I will publish more pictures of this gel polish as well as my nail art :) In the meantime, here's a couple from day one:

Segui cada um dos passos mencionados e já comecei o meu teste de durabilidade com o verniz gel Sensationail Pink Chiffon, no sentido de compreender se o verniz gel permanece em condições nas duas semanas indicadas pela marca. Quando atingir 7 dias vou fazer um post de actualização para que vocês vejam o estado das minhas unhas nessa altura ;) Como sabem (ou deviam saber chicas!), o mês de Outubro é dedicado à consciencialização do cancro da mama e a cor que o representa é o rosa. Como ainda não fiz nada para suportar esta causa, decidi redimir-me com o Pink Chiffon. Deste modo, ainda esta semana vou publicar a minha opinião sobre o verniz gel em questão, bem como uma nail art linda! :p Entretanto, eis algumas fotos do verniz gel Pink Chiffon no dia 1:
Have you tried this gel polish brand before? And the starter kit? What was your experience like? I'll see you soon chicas guapas! Kisses,

Em Portugal, a marca Sensationail é vendida somente nas lojas Perfume & Companhia, portanto há uma perto de vós! :) Podem adquirir o vosso kit online na loja Perfumes & Companhia, como também na loja Cosmética Eficaz. O Preço é de 68.90€ (ou 59.90€ na loja Cosmética Eficaz). Já experimentaram os vernizes gel Sensationail? E o kit de iniciação? Como foi a vossa experiência? Até breve chicas e beijinhos :)

Sensationail Portugalhttp://www.sensationailpolish.eu/p/index/sensationail
Sensationail Portugal Facebook Page
https://www.facebook.com/SensationailPortugal
Cosmética Eficazhttp://cosmeticaeficaz.com/pshop/
Perfumes & Companhiahttp://www.perfumesecompanhia.pt/pt/


Cristina Santos***
*Products provided by Sensationail Portugal for my honest and unbiased review 
*Produtos enviados pela Sensationail Portugal para revisão honesta e imparcial 

Disqus Comentários